Hey there, people on hosted platforms don't like if they try to logon and fail…
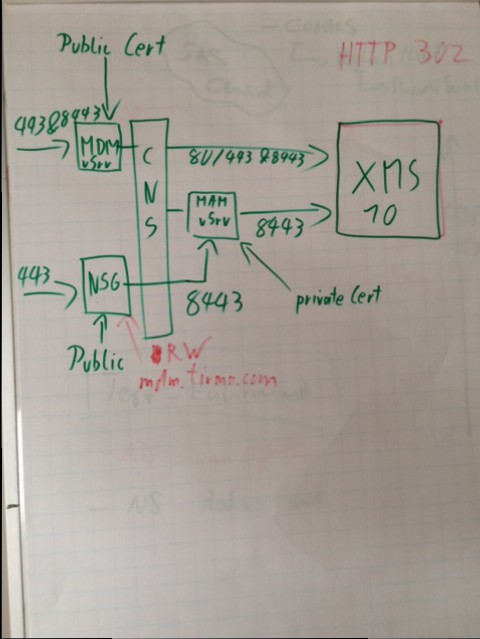
XenMobile 10 POC Installation using SSL_Bridge
XenMobile 10 is out!
But just for new installations, the upgrade path is expected to be released in the next 6 weeks
As there is nothing out there yet I’ve decided to write up some.
Please bear in mind that I don’t know if developers do really want to set it up like this, use at your own risk. However, it’s working 😉
This environment is set up using NetScaler 10.5 Build 54
My internal Network is 192.168.84.0/24 and the internal dns namespace is cch.local
My DMZ/External Network is 192.168.137.0/24 and the external dns namespace is cch.external & adnlab.de (I had to reuse an official certificate for netscaler gateway) means my external FQDN for MDM is mdm.cch.external and the external FQDN for NetScaler Gateway is login.adnlab.de
Update
- The internal loadbalancer for MAM should have the same name as the FQDN entered into the XMS Server
- Using NetScaler 10.5 Build 55 does not require anymore that you create the MDM Loadbalancer manually as it doesn’t run into conflicts anymore
XenMobile Server Setup
1. Download the Appliance from , import it to your hypervisor and start it.
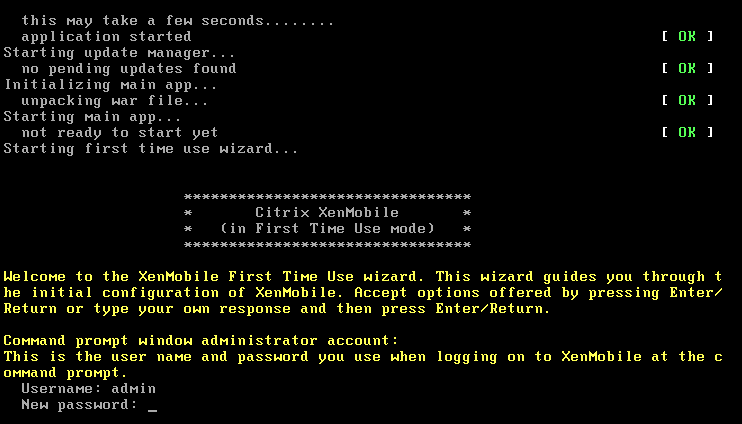
2. Set a username and password for the local user account
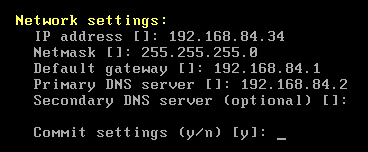
3. Enter your network information
![]()
4. Random secrets always sound good
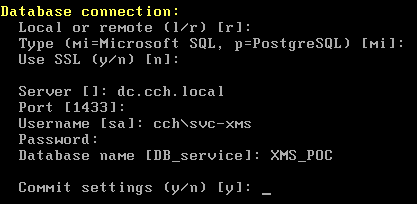
5. Connecting to MSSQL, in my test environment this is on the domain controller.
Important! The Account used for DBAccess must be specified in SamAccountName-Format, means domain\username
![]()
![]()
6. Cluster in preparation on more blogs
![]()
![]()
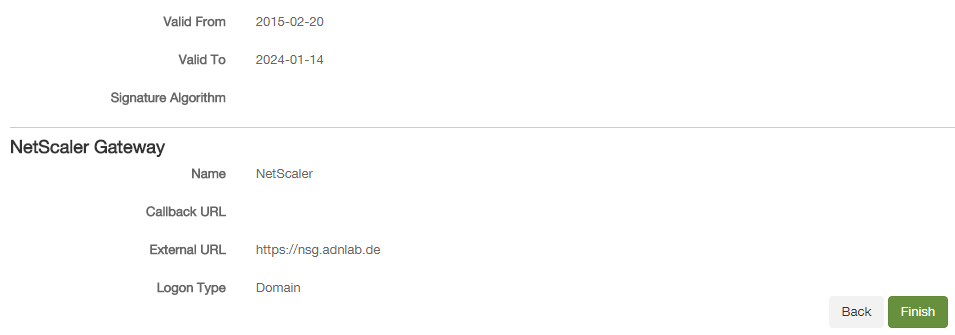
7. Important! Specify the external FQDN

8. enter y to commit the settings
![]()
![]()
9. I’m using default ports

10. As this is just a test environment, I’m going to use the same password for all certificates
![]()
![]()
11. We don’t upgrade from an earlier version
12. Console configuration is finished, now open a webbrowser connecting to https://xms-server:4443 and ignore the SSL certificate warning

13. Login with the credentials specified during the console initialization

14. Next
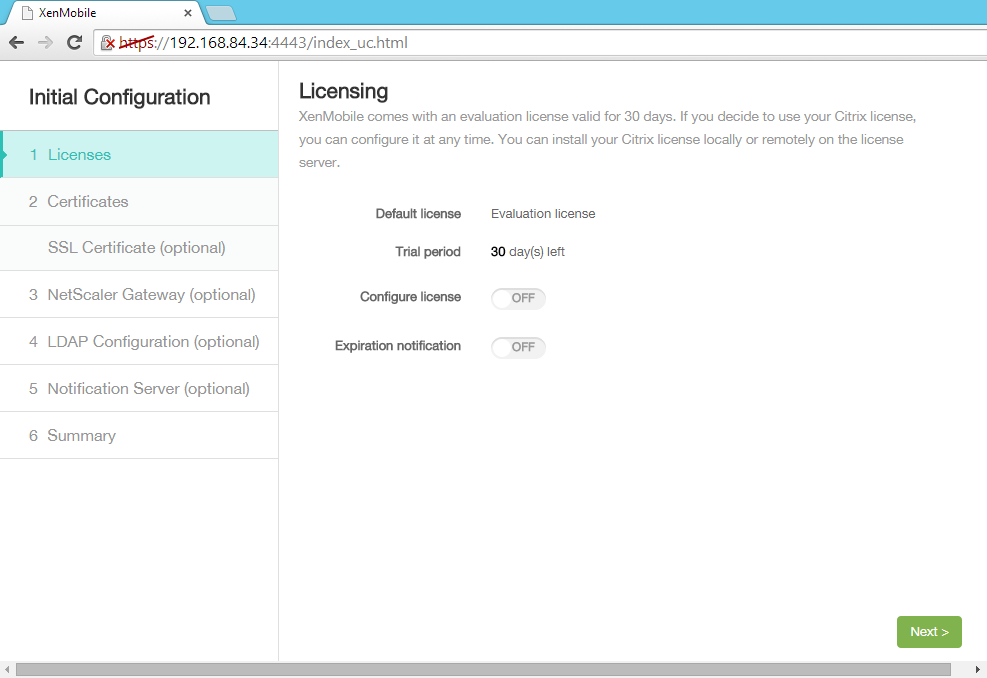
15. I don’t have a license server in place right now, so skipping this configuration
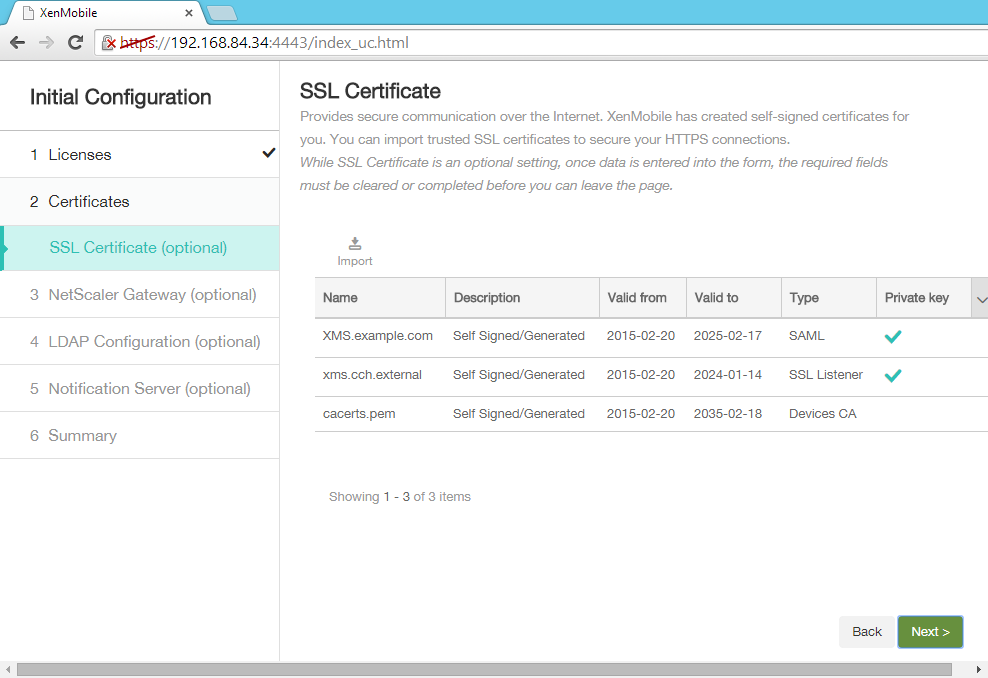
16. On the certificate page, click on import
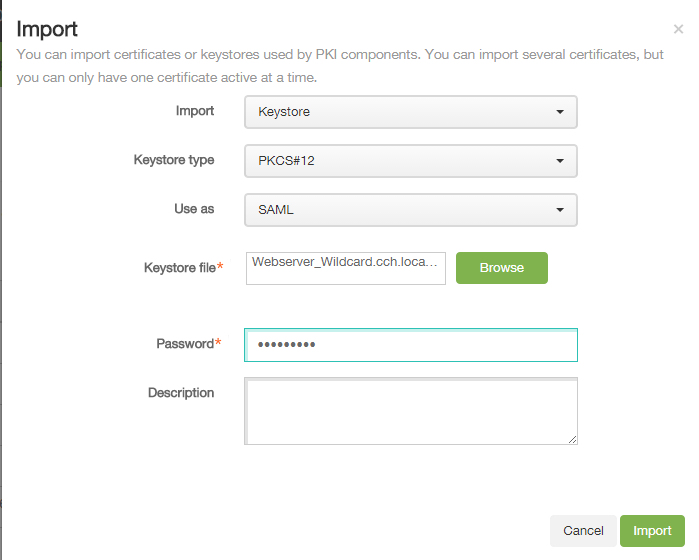
17. Select a non-chained web certificate for SAML, doesn’t matter if from a public or private PKI
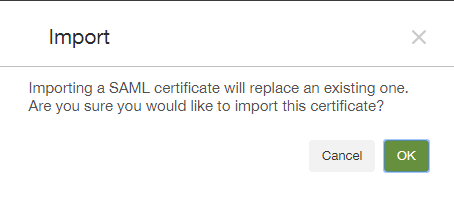
18. Click OK, we want to replace the certificate
—- missing screenshot ———-
19. Import the APNS certificate if you want to use iOS devices as well

20. On the next menu, enter your the external FQDN for NetScaler Gateway
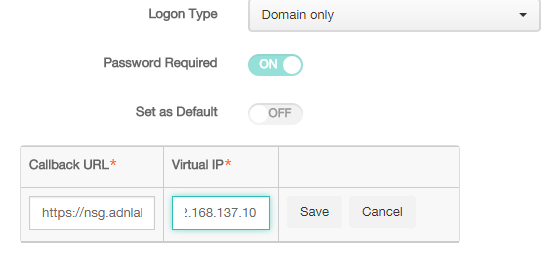
21. Click on Add and enter the callback address and VIP for netscaler gateway (usually the same FQDN as the external)
That address must be reachable from the XenMobile Server
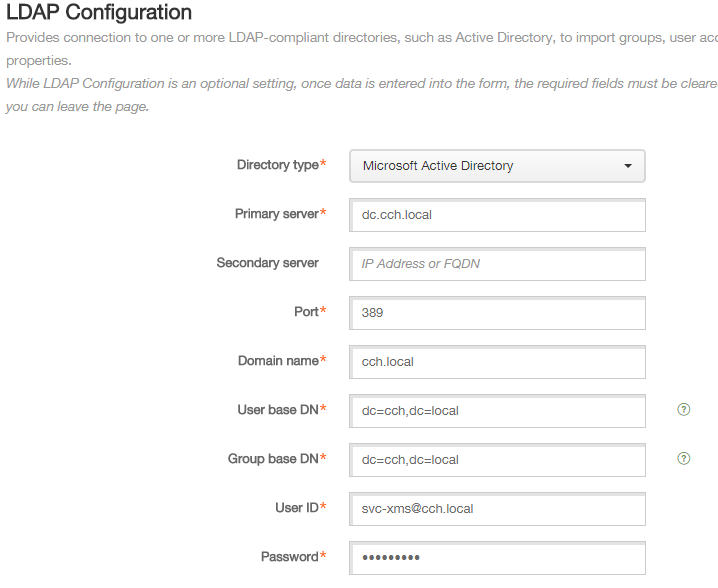
22. On the next screen, enter your details for connecting to your domain controller
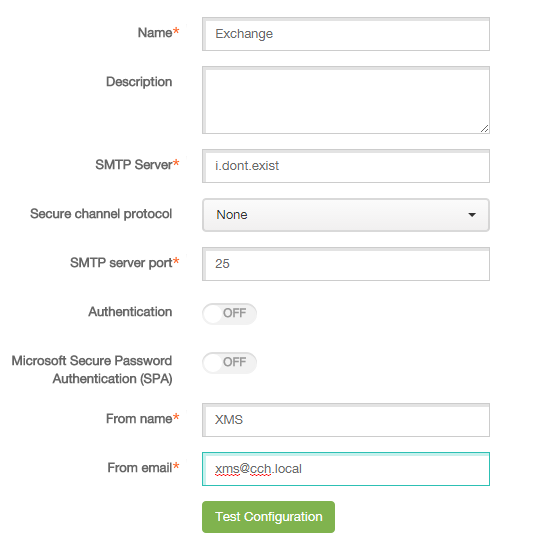
23. Enter your smtp details if they do exist 😉
24. Review everthing and save it
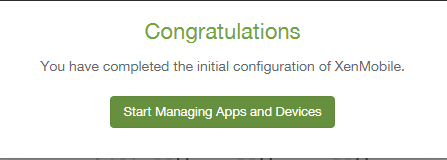
25. Click Start Managing

26. Click on Configure -> Device Policies -> Add
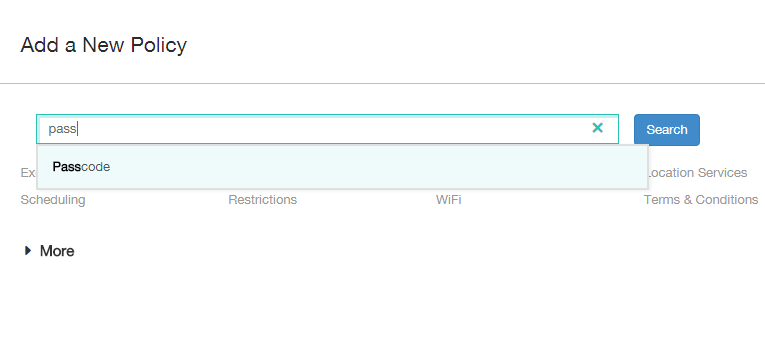
27. Search for Passcode
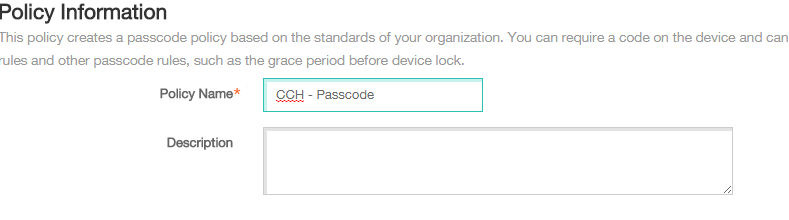
28. Name the policy

29. set the parameter for iOS Passcode policy
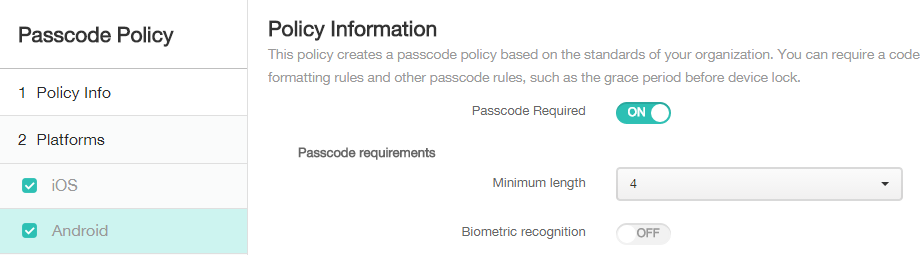
30. set the parameter for android password policy
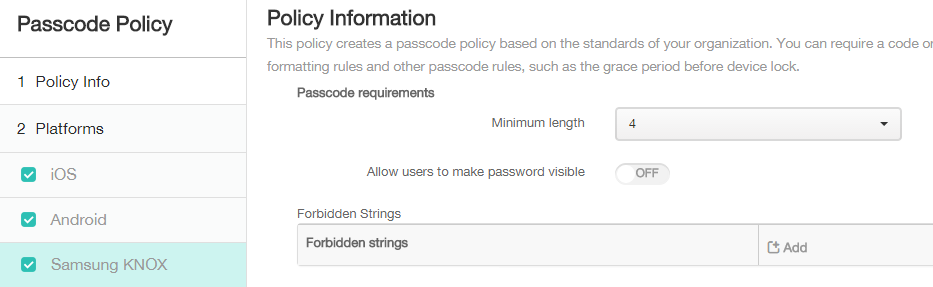
31. samsung know configuration
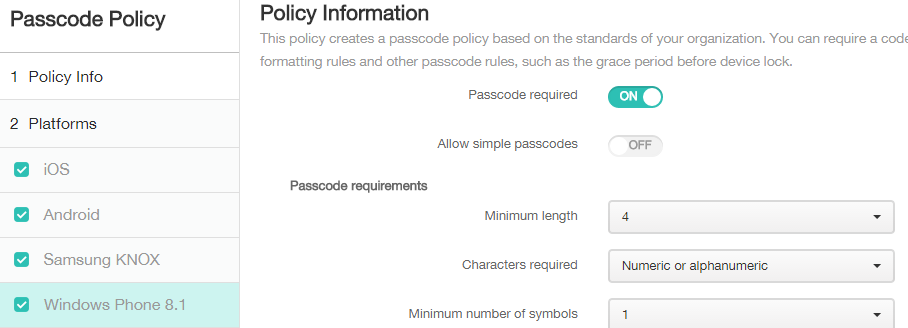
32. windows phone settings
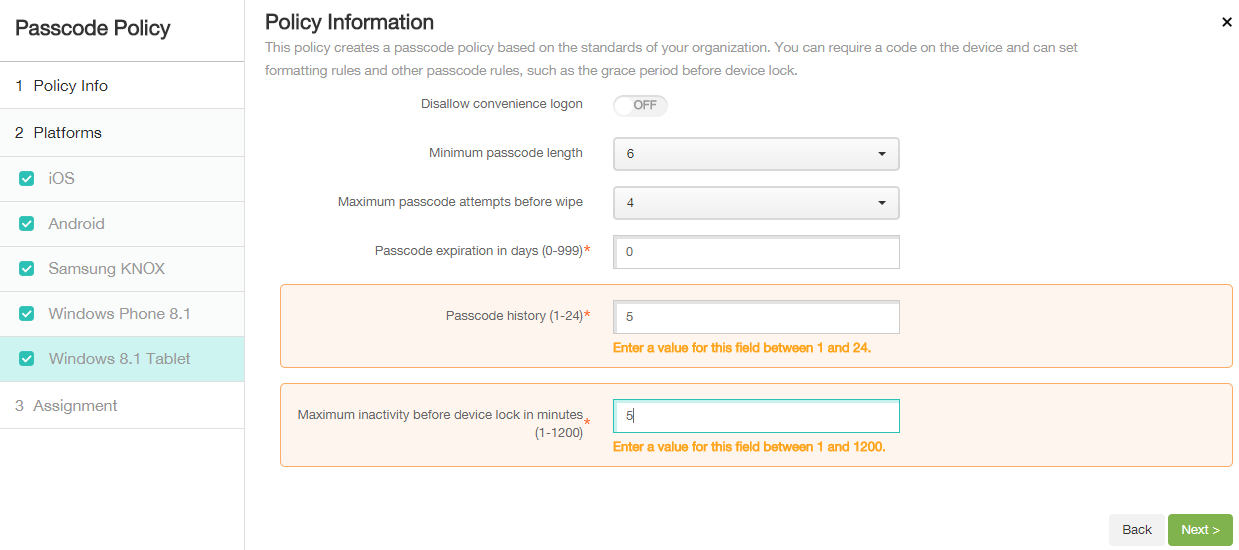
33. windows tablet password config

34. this is going to be effective for all users

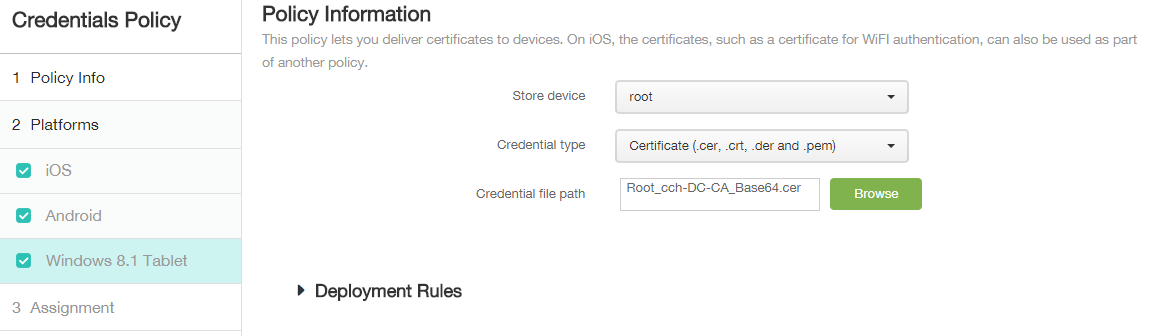
35. second policy for deploying the internal CA certificate, search for Credentials

36. give it a name

37. import the Microsoft CA Certificate in base64 format

38. same for android
39. and for Windows Phone
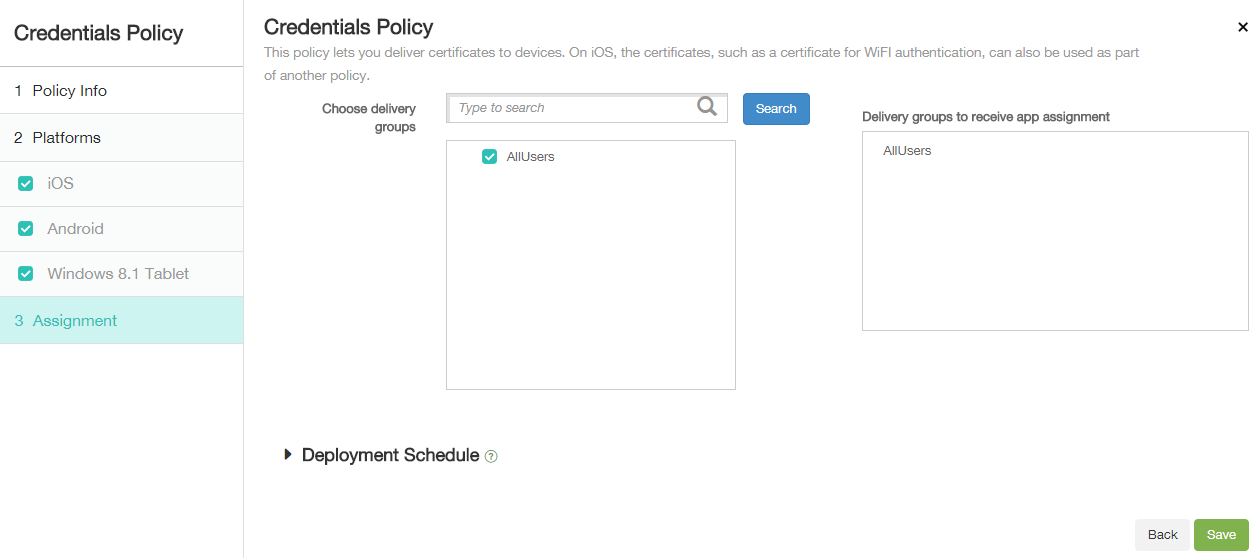
40. add it to the deployment group for all users
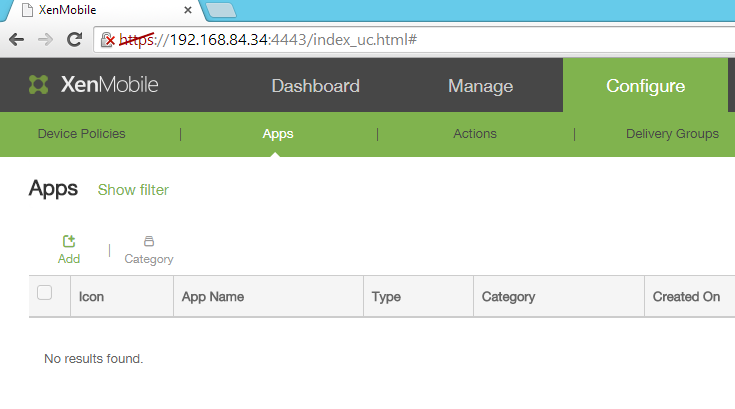
41. Go to Configure -> Apps -> click on Add
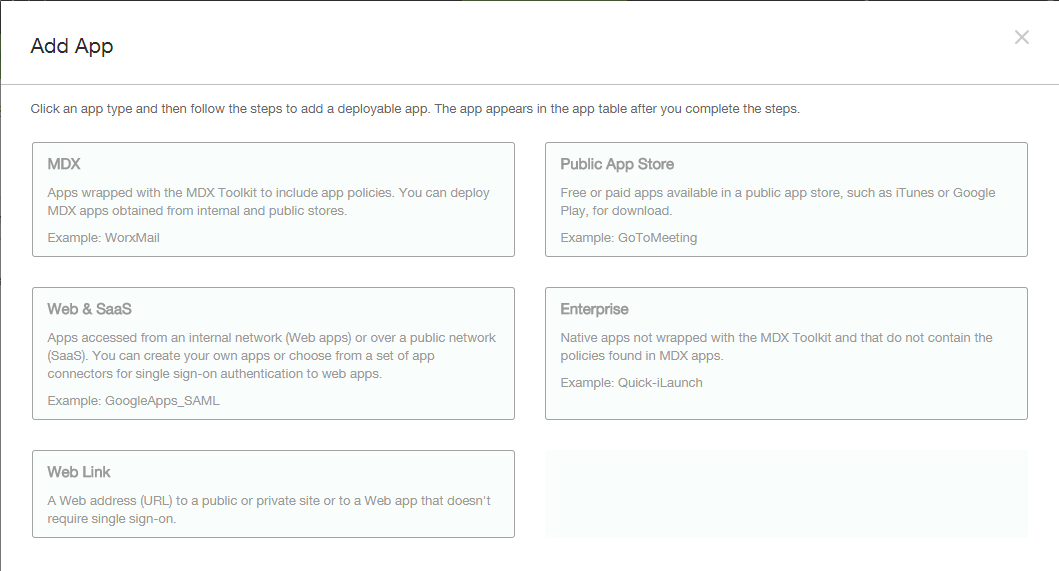
42. Select MDX File

43. I am going to create a App distribution for WorxWeb

44. Select the wrapped WorxWeb MDX for iOS and set the desired options
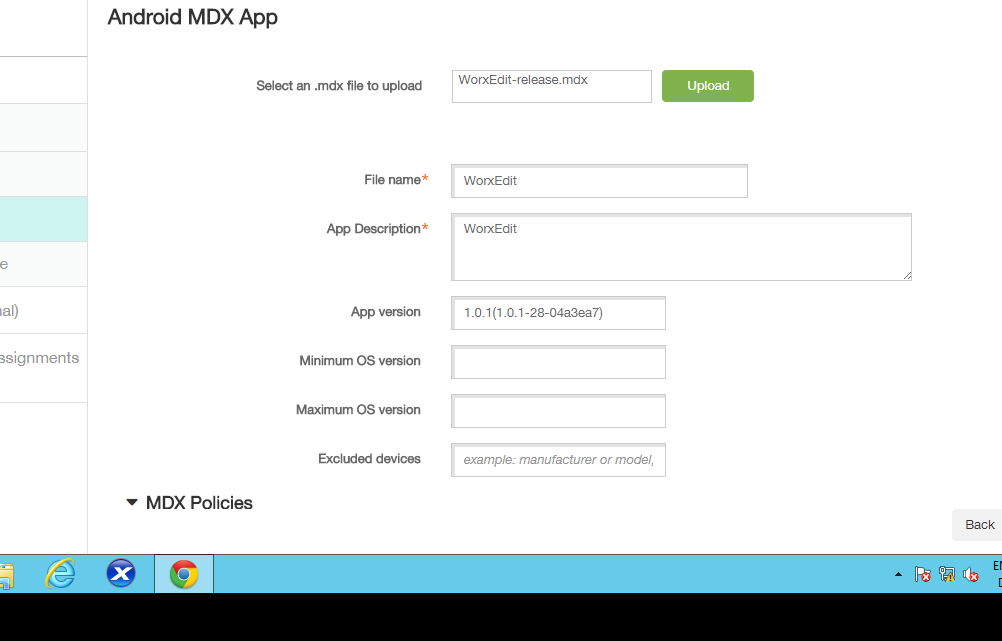
45. Select the wrapped WorxWeb MDX for Android and set the desired options
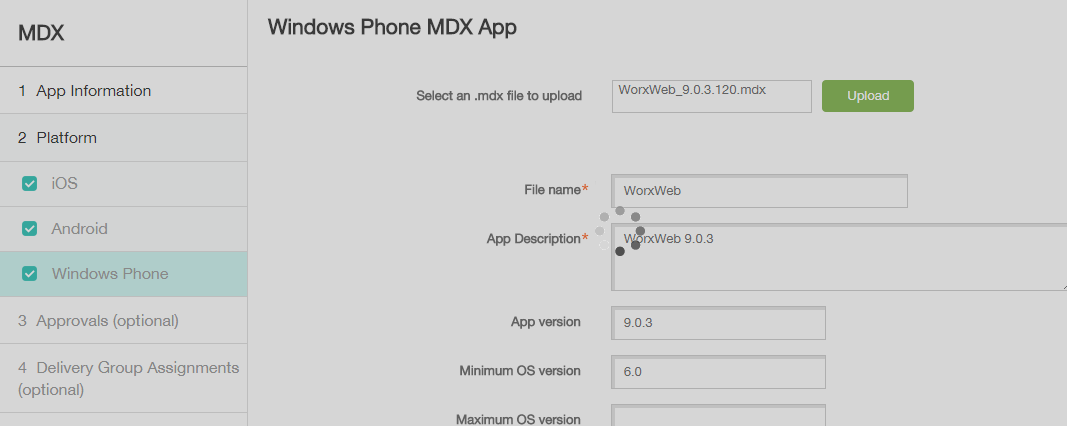
46. and import the mdx for Windows Phone 8.1
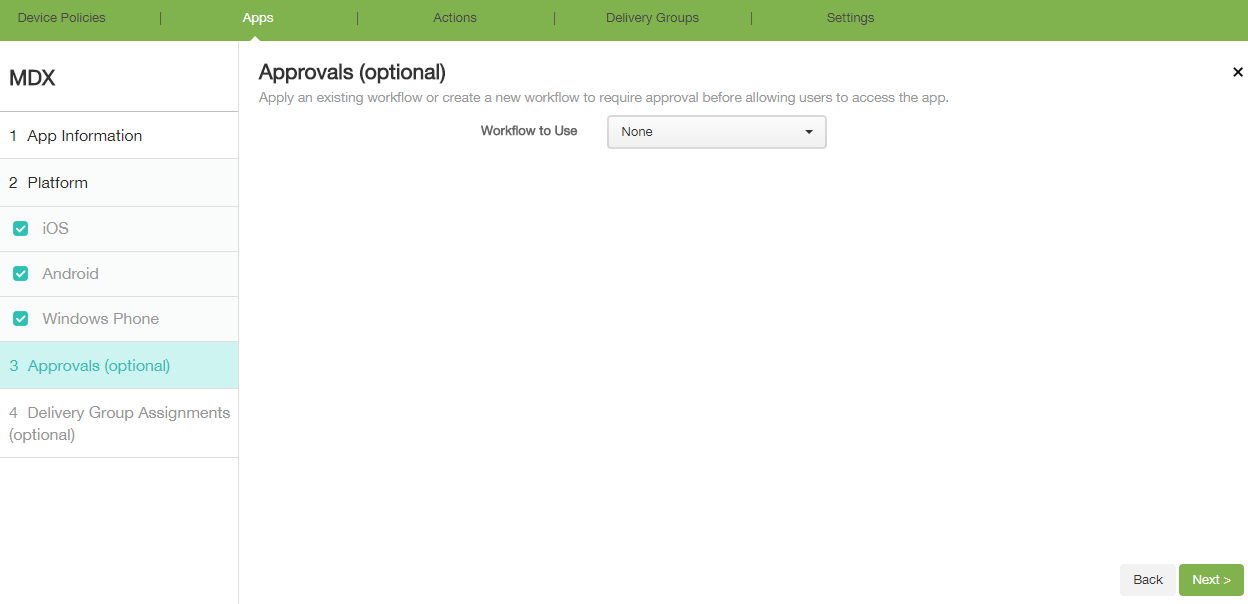
47. No workflow

48. for all users, later this does not push out the app to the user, for pushing the app you must change that directly in the delivery group
NetScaler Setup
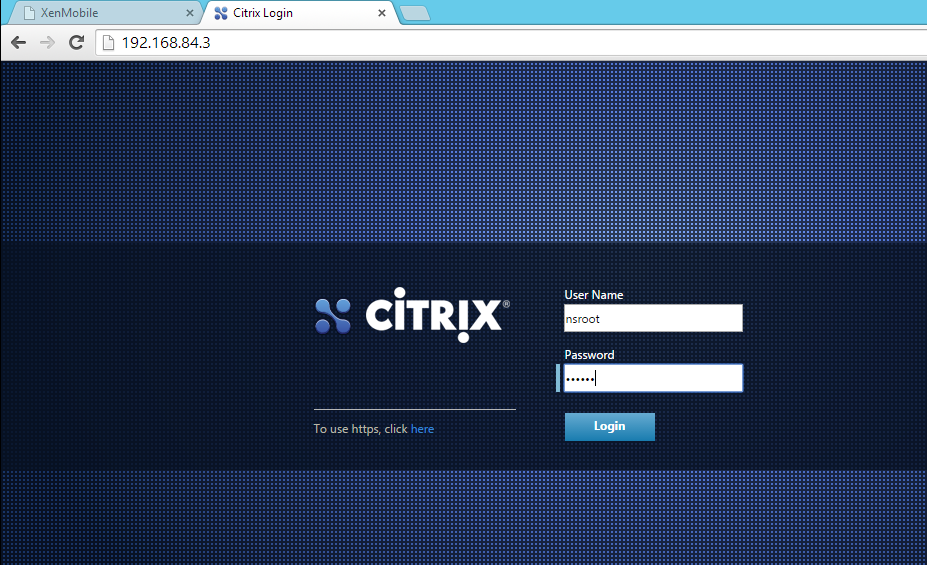
49. Get over to your netscaler and log on
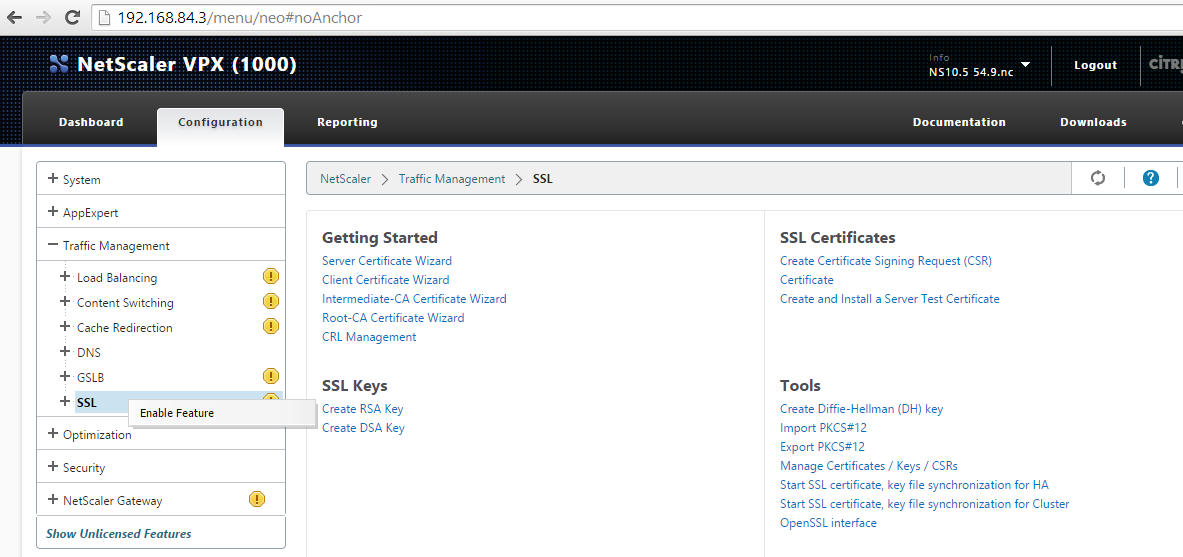
50. Enable the SSL feature
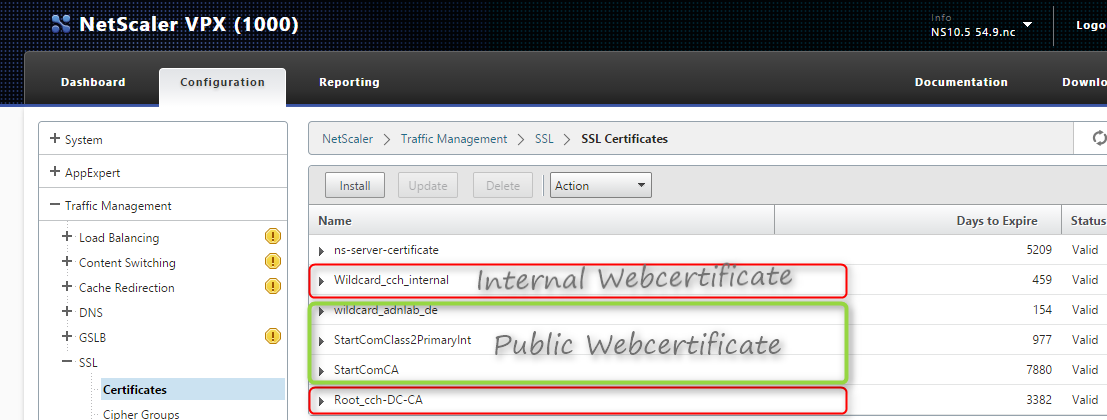
51. Import the required certificates
The Internal Wildcard is used for an internal loadbalancer for MAM and the official certificate is used for NetScaler Gateway
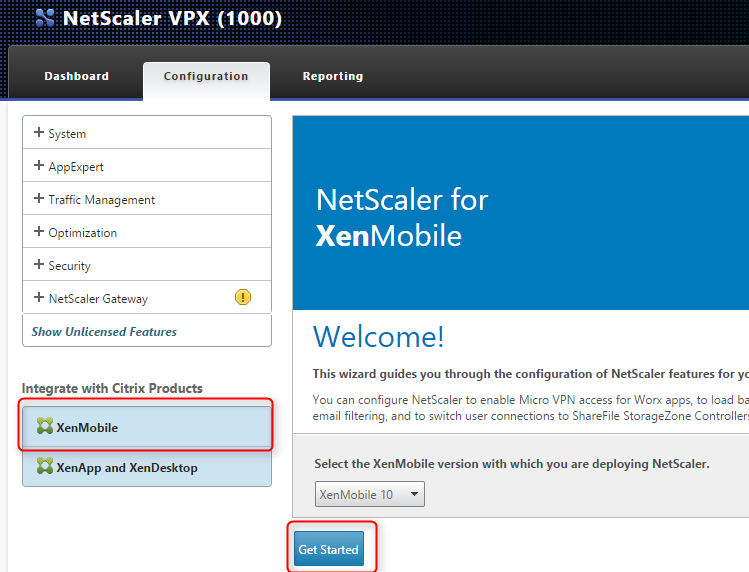
52. I’m going to use the wizard as this is a fresh new netscaler, furthermore it is just for a POC

53. Do not select the wizard for Loadbalance MDM, otherwise the wizard will crash as it tries to add the same server ip multiple times
Do just select the wizard for NetScaler Gateway
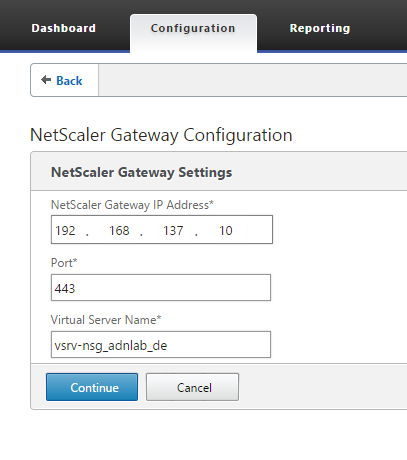
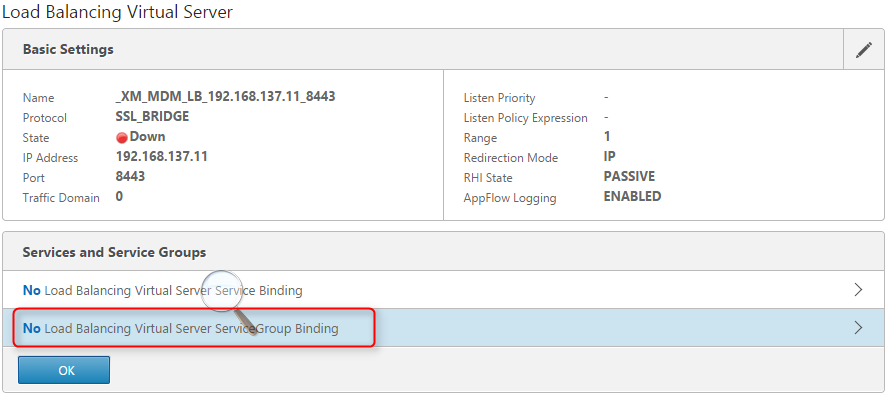
54. set the vSrv Name and VIP
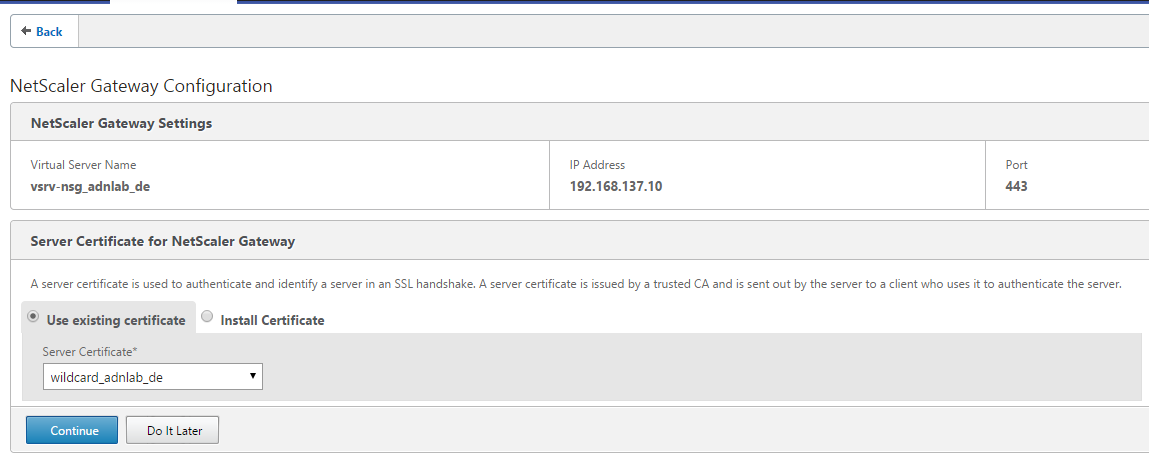
55. select the public certificate

56. enter your active directory LDAP details
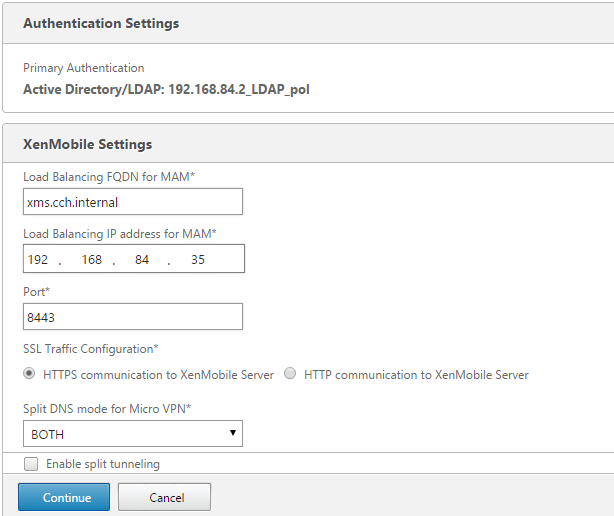
57. use an new internal name and make sure that DNS is pointing to the used IP. NetScaler must be able to resolve the FQDN
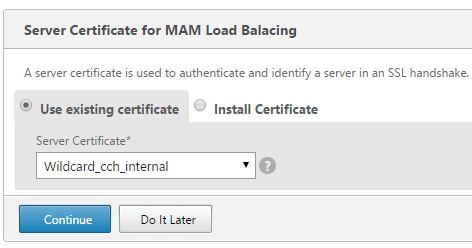
58. Select the internal certificate
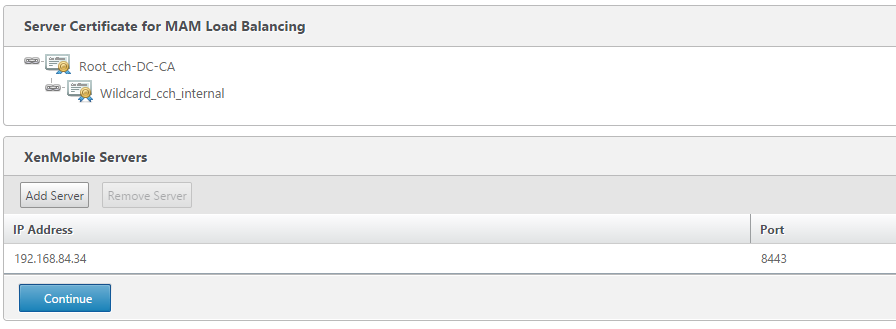
59. add the IP of your XenMobile 10 Server using port 8443
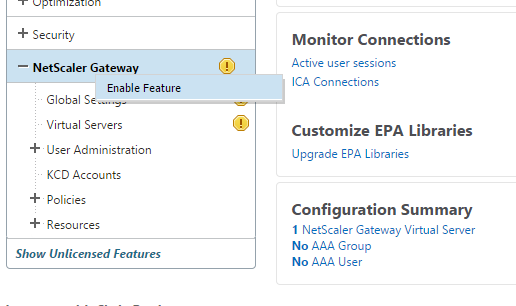
60. The Wizzard didn’t activated the NetScaler Gateway Feature, right click it -> Enable

61. Now we need to create the vServer for MDM. As you can see, the Server is already added and that’s where the MDM wizzard would crash

62. Create a new service group on Traffic Management -> Loadbalancing -> Service Groups
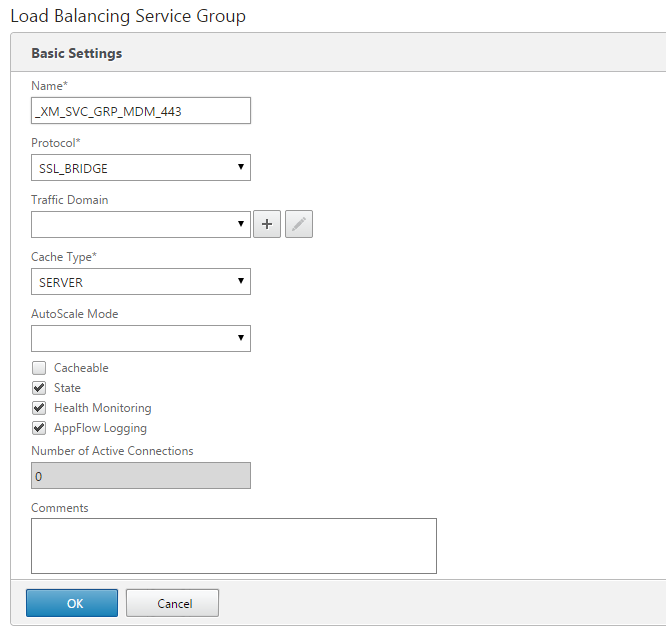
63. We are going to create a SSL_Bridge Service for MDM Port 443

64. Click on Service Group Members

65. Choose existing server, selecting your XMS IP and enter 443 as port
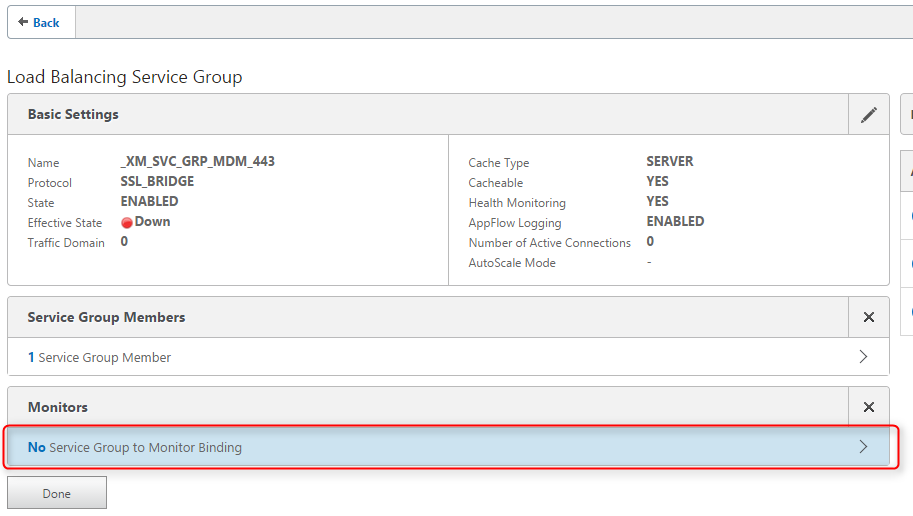
66. Click on Service Group to Monitor binding

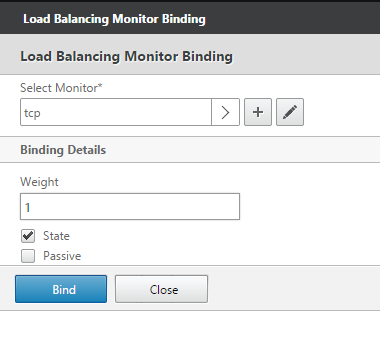
67. Select tcp and bind it as monitor

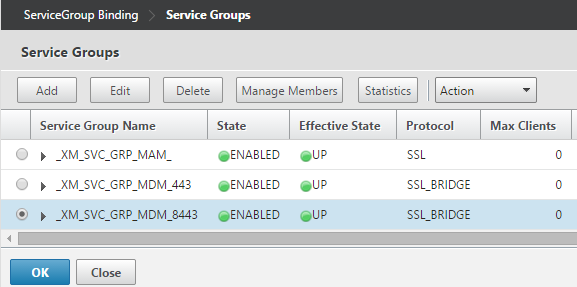
68. We are going to redo the steps for port 443 but for port 8443, add another service group type SSL_Bridge

69. Select again your XMS IP but this time enter 8443
70. and bind a tcp monitor

71. Your final result on Service Groups should look like this, if a service group is down directly after creating is, try to refresh as sometimes the GUI is faster then the first check
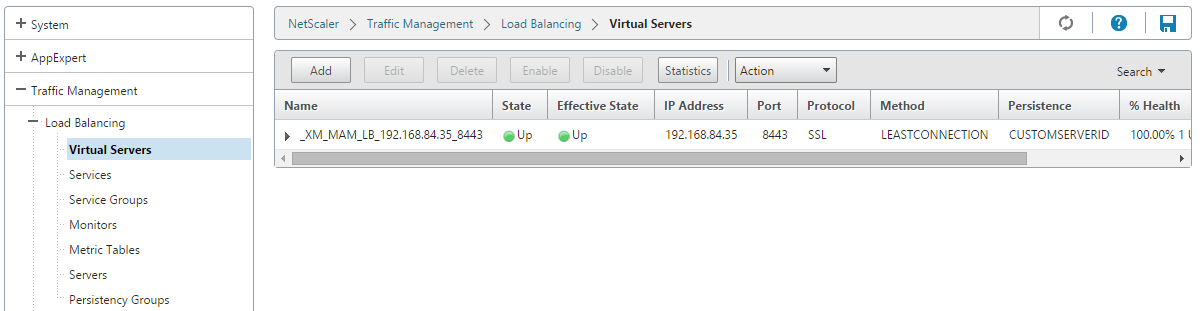
72. Switch over to Traffic Management -> Loadbalancing -> Virtual Server and click on add

73. create a new server using the ip getting resolved for your external MDM FQDN for port 443
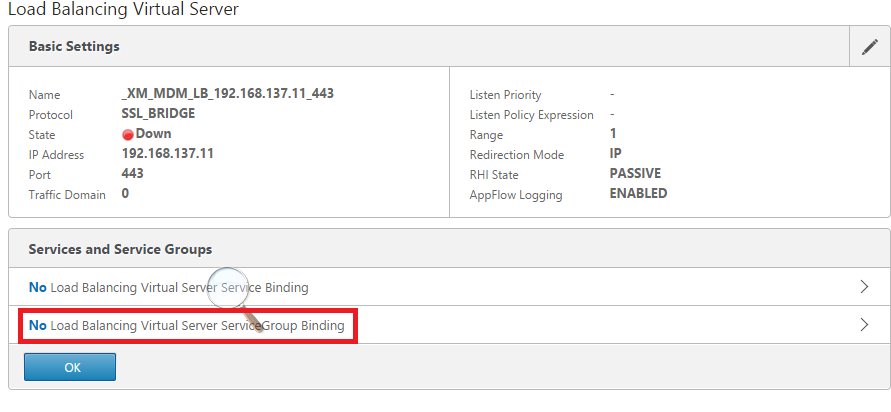
74. Click on Load Balancing Service Group Binding
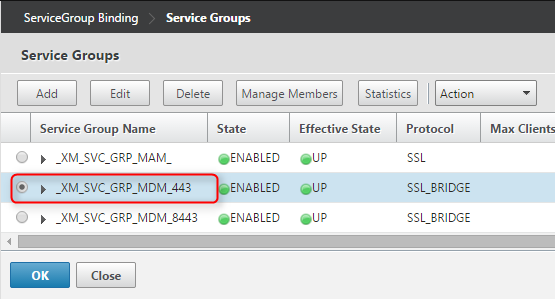
75. select the service group for MDM on port 443 created earlier
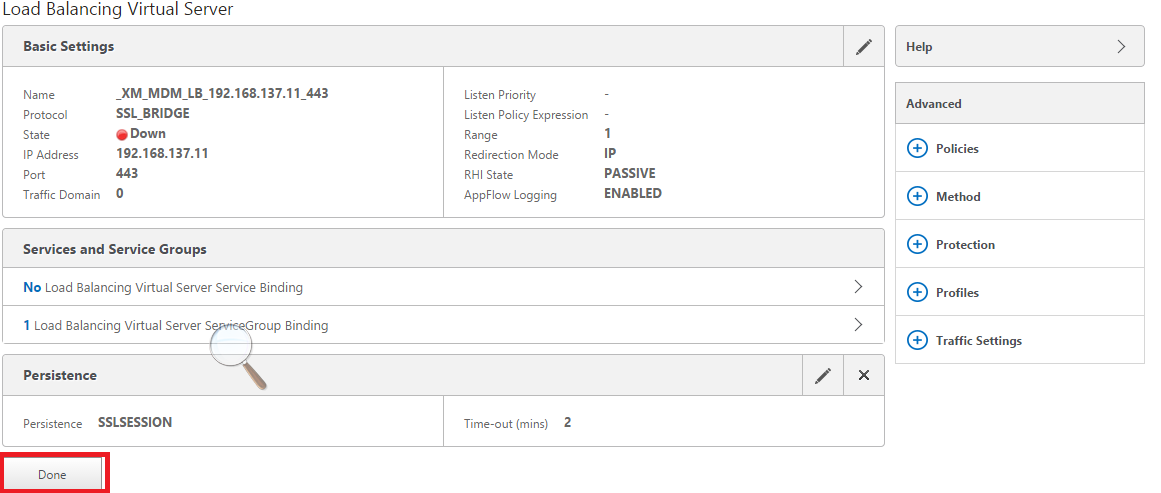
76. click on done

77. Add another vServer, but this time this is going be used for port 8443
78. Bind a service group
79. and select the service group being used for 8443
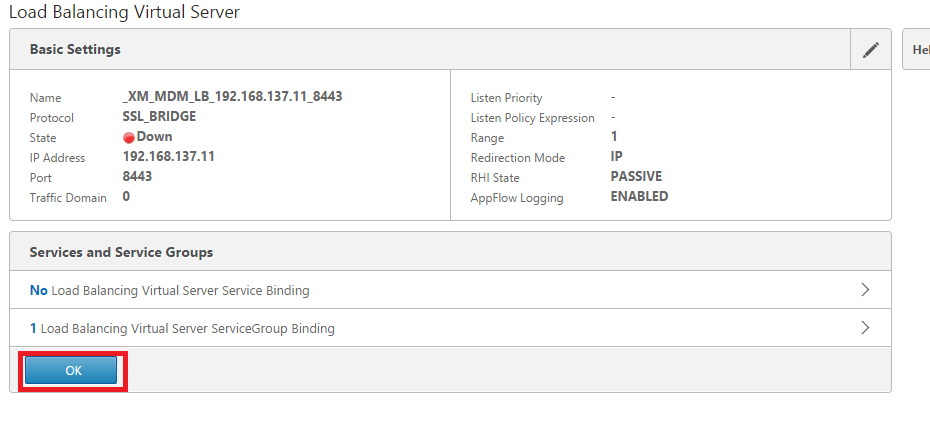
80. click on done
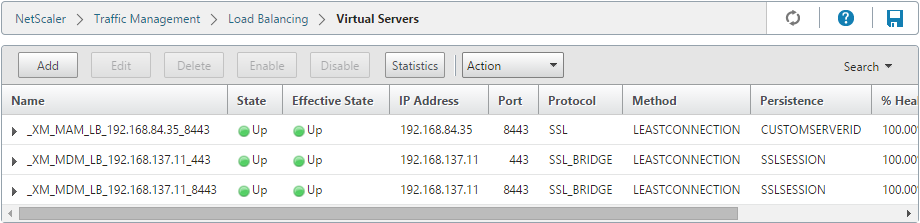
81. Your final result on the virtual server configuration should look like this
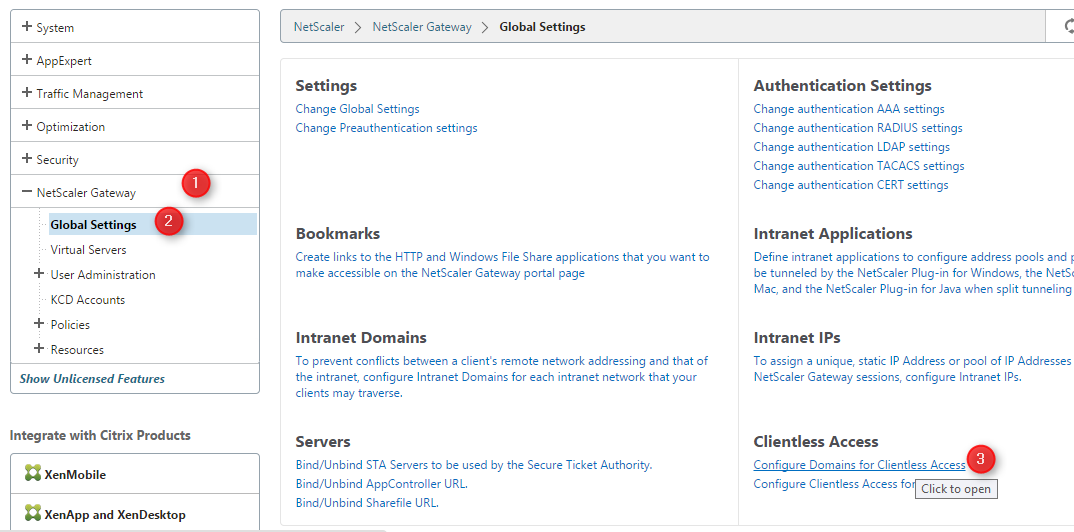
82. as last step you need to add the external FQDN being rewritten by netscaler gateway, otherwise you wont be able to open the worxstore. Click on NetScaler Gateway -> Global Settings -> Configure Domains for Clientless Access

83. and add your external FQDN of MDM there
the FQDN of your MAM Loadbalancer should be here in too
Result
and it „worx“!
——————————————————
Appendix
I forgot to include the Screenshots for the APNS and SAML certificate
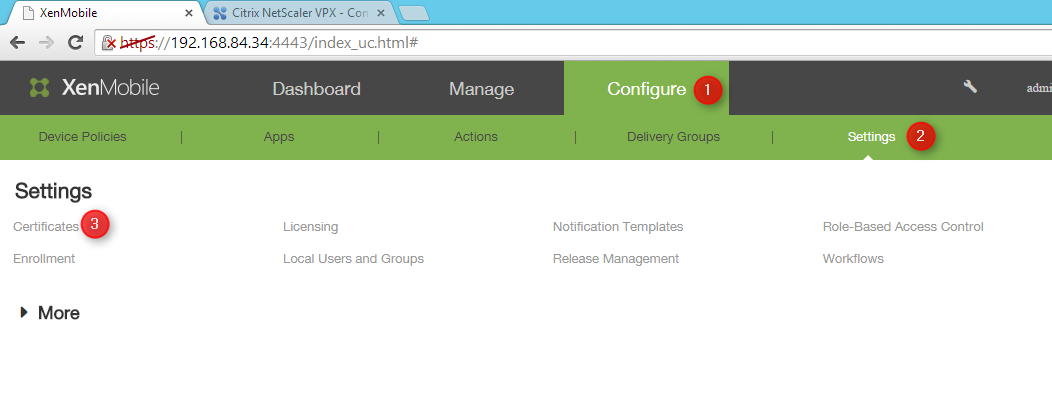
1. on the XMS click on Configure -> Settings -> Certificate
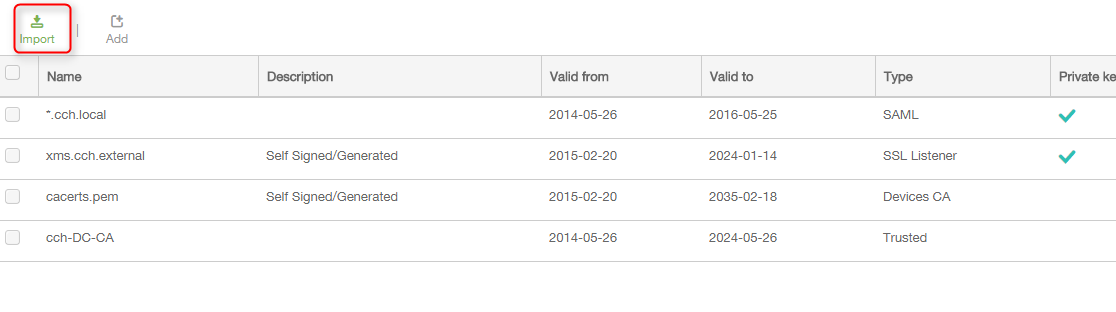
2. Click on Import
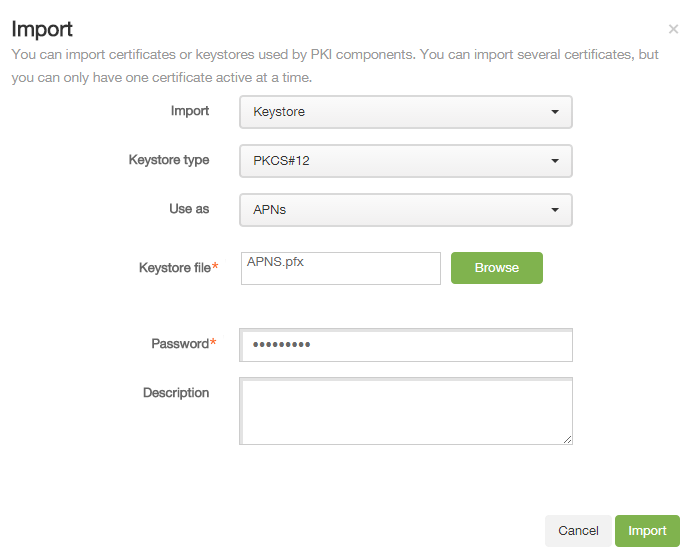
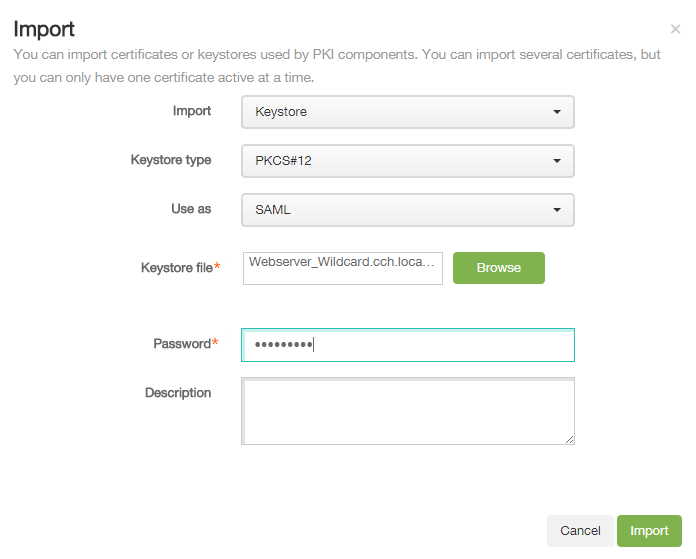
3. Select Keystore, PKCS#12, Use as APNS and select your APNS Certificate provided by Apple
4. Click again on import
Select Keystore, PKCS#12, Use as SAML and select non-chained webserver certificate
Frühere Beiträge
Hello, this is a very good tutorial.
Since NetScaler now provide wizard for XenMobile integration. Do we still need to perform step 82 and 83 in this tutorial? Because i follow Robin Hobo tutorial on Installing and Configuring NexMobile (including NetScaler, using wizard) and MDM functions fine but i cannot access Worx Store with error message : „Please contact support for accessing your app“ … I suppose it has something to do with step 82 and 83
Hi Dwianto,
Netscaler Gateway must rewrite the URL sent out by XMS for the WorxStore, otherwise there is no access token.
In other words, your symptoms are typical for missing rewrites, means go ahead an add the official URL of your XMS to the steps 82 and 83 if not done by the wizard already
can we install my poc without using netscaler ?
and i don’t have any certificate unless internally, can you show us how to generate it ?
can you also to show us how did you enroll your device ?
your tutorial is very helpful, thank you very much.
Hi Youssef,
sorry, I was quite busy in the last time.
Yes, you can run XenMobile without NetScaler in place but you will lose the mVPN functionality.
The device can be enrolled using WorxHome entering the FQDN of the XMS server
In step 52 why is private wildcard certificate really neccessary for MAM load balancer? Can we use external Cert for XMS if according to your updated status : FQDN of MAM loadbalancer must be exactly the same as for XMS?
Hi Igor,
It must be a valid trusted certificate for the client device. At the point of writing, it was possible to deploy the internal CA certificate on MDM. Due enhancements it seems that this is not working anymore as the device hits the load balancer before the root certificate is distributed. My recommendation is to use a public certificate on the MAM loadbalancer (the same you may use on the XMS Server)
Mauricio